
There’s something genuinely special about owning a Jeep Wrangler JK. For me, it’s not just a vehicle; it’s an extension of who I am. Every dirt trail, every city street, my Jeep and I have shared countless memories. Just like any other valuable possession, it’s essential to keep this beloved ride in top-notch condition, ensuring every part is functioning and looks pristine.
The other day, however, my Jeep had a little mishap, which made me dive deep into the world of auto repairs. It was a learning curve, filled with emotions and newfound knowledge. I decided to share my journey, hoping it might help another Jeep owner someday.
Contents
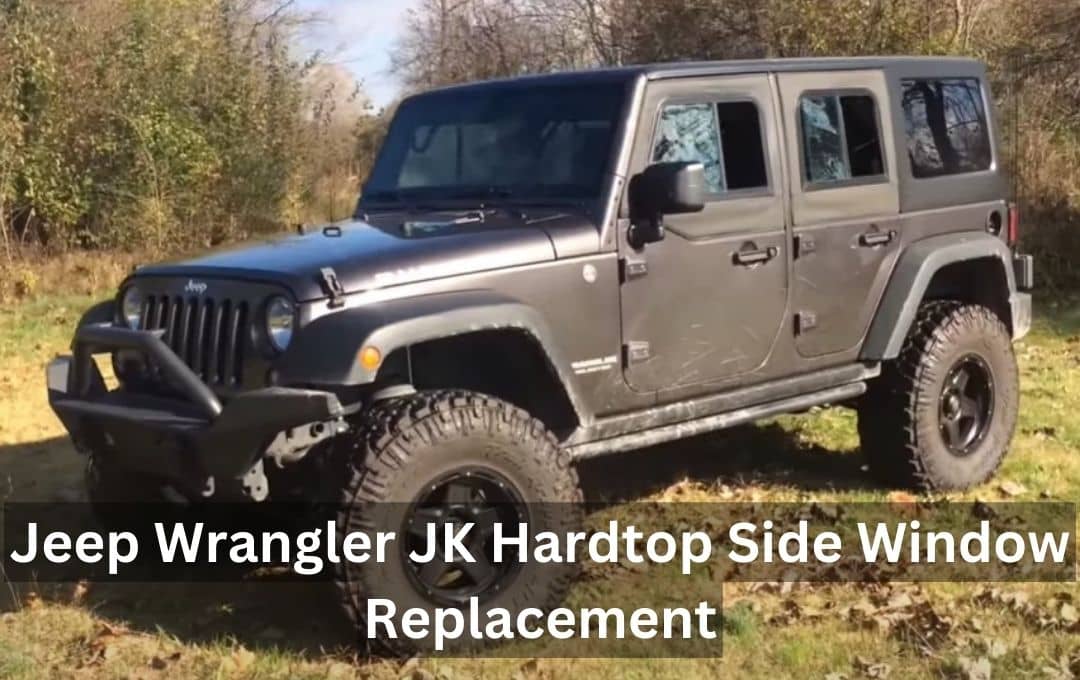
The Unfortunate Incident
On a seemingly ordinary afternoon, parked under the usual oak tree, disaster struck. A stray branch, heavy with the weight of recent rainfalls, came crashing down. The casualty? My Jeep’s side window. I remember that sinking feeling, the sudden rush of anxiety as I assessed the damage. It was more than just shattered glass; it felt like a wound on something I cherished.
However, instead of getting bogged down by the setback, I saw it as an opportunity. A chance to learn something new and perhaps save some money along the way.
Deciding on DIY vs. Professional Replacement
My first instinct was to rush to a professional. But the adventurer in me, inspired by countless DIY YouTube videos and Jeep forum discussions, pondered the feasibility of a self-repair. There were pros and cons on both sides. Professionals assured quality, but the costs were notably high. DIY had its risks, but the potential rewards were enticing.
After much contemplation, I took the plunge into the DIY world. The reasons? A blend of economic considerations and the sheer thrill of learning and overcoming challenges.
Gathering the Necessary Materials
Finding the right replacement window became my top priority. After some searching, I located one specifically designed for the Jeep Wrangler JK hardtop. Next up was the toolkit. I sourced a gasket scraper, utility knife, and a special adhesive meant for automotive glass.
Safety, of course, was paramount. Equipped with safety goggles and thick gloves, I ensured I was protected from any mishaps. Setting up a well-lit workspace was the final step before diving into the task at hand.
The Replacement Process: Step-by-Step from My Perspective
Preparation Phase
- Interior Cleanup: Started by carefully vacuuming the Jeep’s interior to pick up any broken shards of glass. Using a soft brush and handheld vacuum, I ensured no tiny fragments were overlooked.
- Protection: Draped protective sheets over the seats, dashboard, and floor to shield them from stray adhesive or glass during the replacement.
- Frame Examination: Conducted a meticulous inspection of the window frame, ensuring it was void of any old adhesive, glass remnants, or debris. A clean slate was crucial for the success of the new window’s fit.
Tools and Material Handling
- Tool Familiarization: Spread out each tool, taking time to get comfortable with their feel and use. Practiced gripping the utility knife and ran a few trial runs with the adhesive on spare materials.
- Safety First: Double-checked the fit of my safety goggles and gloves. They needed to be secure yet comfortable for the process ahead.
Installation Phase
- Frame Cleaning: Before introducing the new window, cleaned the frame with a gentle, alcohol-based solution to rid it of any residual dirt or oils that might compromise the adhesive’s bond.
- Dry Fitting: Positioned the new window against the frame without adhesive to pre-emptively identify any potential issues or misalignments.
- Adhesive Application: Applied the adhesive methodically, ensuring a steady, even bead throughout the frame. This balance was crucial – too much could be messy and too little might not hold the window securely.
- Setting the Window: With the adhesive applied, carefully placed the new window into position, pressing uniformly to ensure a firm bond.
Post-Installation Checks
- Curing Patience: Allowed the adhesive adequate time to cure and establish a robust bond. Resisted the temptation to immediately test the window.
- Gap & Bubble Inspection: As the adhesive dried, I remained vigilant, spotting for potential gaps or bubbles that might compromise the seal.
- Edge Examination: Once fully set, run fingers along the window edges, ensuring a flawless fit without any rough spots or inconsistencies.
- Interior Finalization: With the window in place, removed all protective sheets and gave the interior another round of vacuuming to ensure a spotless finish.
First Drive with the New Window
- Testing Conditions: Embarked on a drive across varying conditions — from high-speed highways to rain-soaked roads — to rigorously test the new window.
- Observations: Throughout the drive, keenly observed for any signs of leaks, unusual sounds, or potential issues with the window. Everything held up seamlessly, indicating a job well done.
The entire process, while demanding, was an enlightening journey into the nuances of car maintenance and the rewards of hands-on work.
Challenges Faced During the Replacement
It wasn’t all smooth sailing, though. The window alignment was tricky, requiring multiple adjustments. Achieving that perfect, airtight seal was another hurdle. At times, doubt crept in. Was I out of my depth? But with every challenge, I grew more determined, more focused.
The experience was humbling, teaching me the value of persistence and the joy of overcoming obstacles. It wasn’t just about fixing a window; it was about proving to myself that with the right attitude, any challenge can be conquered.
Depth of Expertise Acquired
This journey had transformed me. Not only did I gain intricate knowledge about the design of my Jeep’s hardtop windows, but I also developed tangible skills in auto repair and maintenance.
While I was proud of my newfound expertise, the experience also gave me a deep appreciation for professionals in the field. Their work is an art, honed by years of practice, and it was an honor to walk, even briefly, in their shoes.
Reflections and Feelings Post-Replacement
Once the dust settled, a sense of profound satisfaction enveloped me. That indescribable feeling is when you’ve tackled a problem head-on and emerged victorious. My Jeep, gleaming with its new window, felt renewed, and so did my spirit.
This journey wasn’t just about a window replacement. It was a testament to human spirit and resilience. A lesson that with the right tools, information, and determination, we can overcome any challenge.
Advice for Fellow Jeep Wrangler JK Owners
For anyone considering a similar DIY adventure, my first piece of advice would be to ensure you have the right tools and materials. Don’t compromise on quality; it makes all the difference. Secondly, be patient. Not everything will go according to plan, but that’s okay. Take your time and learn from any mistakes.
And if ever in doubt, don’t hesitate to seek professional help. This journey taught me the value of both self-reliance and recognizing when it’s time to call in the experts.
FAQs about Jeep Wrangler JK Hardtop Side Window Replacement
How long did the entire replacement process take from start to finish?
From my personal experience, while the actual hands-on replacement might take a few hours, the total duration can extend based on factors like adhesive curing time and post-installation checks. I’d recommend setting aside a full day, especially if it’s your first time. This allows you to proceed without rushing, ensuring a flawless job and ample time for any unforeseen challenges.
What was the most challenging aspect of the DIY replacement, and how did you overcome it?
Aligning the new window perfectly and ensuring an airtight seal was quite challenging for me. Achieving this required patience, multiple adjustments, and constant checks. I frequently referred back to online forums and videos, gaining insights from other Jeep owners who undertook similar projects. Their tips and my persistence eventually led to success.
Do you believe this DIY replacement saved you money, and would you recommend it to other Jeep Wrangler JK owners?
Absolutely. While there’s an initial investment in tools and the replacement window, the overall cost was notably lower than professional service quotes I received. Beyond the monetary savings, the experience and knowledge gained were invaluable. For those willing to invest the time and effort, and who take pleasure in hands-on work, I wholeheartedly recommend giving it a try. But always remember, if at any point it feels overwhelming, consulting a professional is wise.
Conclusion
Every turn, every bump, and every open road with my Jeep Wrangler JK has etched memories in my heart. Beyond being a vehicle, it’s a repository of shared adventures. So, when that rogue branch damaged its window, it was more than just an inconvenience—it was an emotional jolt. Diving into the world of DIY repair transformed this mishap into a rewarding journey of discovery.
From understanding the nuances of auto repair to the gratification of self-reliance, I emerged not just with a replaced window but also with enriched perspective. And while I cherished the DIY success, it also fostered a newfound respect for those professionals who make such tasks look effortless.
In life, as with Jeeps, challenges are merely opportunities for growth. And this broken window? It was a serendipitous lesson in resilience, resourcefulness, and the sheer joy of hands-on accomplishment.